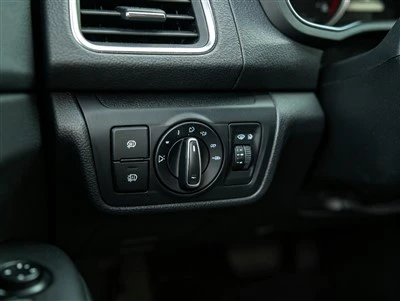
A control-panel builder for dark-room equipment came to us after a backlit silicone keypad came back uneven. On the first build, LEDs sat under a few keys and the silicone was a standard opaque grade. Some keys glowed bright directly over an LED, neighboring keys stayed dim, and the legends lit in patches rather than as an even backlight. The LEDs and the silicone diffusion were chosen separately; nothing spread the light across the key face. We reworked the backlight path to match the LED placement to a diffusion method, and the uniformity came back.
That project frames this guide. A backlit silicone keypad lights the legends or key face so the panel can be read in low light, and the light reaches the finger through one of three common paths: an LED window where a lit area shows through a clear or translucent key, a light guide that distributes LED light across the key or panel, and a tinted or translucent elastomer that diffuses the LED glow through the silicone itself. This guide compares them on uniformity, visibility, cost, sealing and assembly, and maps each method to automotive, medical, industrial and consumer panels.
The backlight sits under or beside the silicone keypad, above the contacts that may use metal domes or a dome sheet array. The lighting method and the contact design are specified together, because LEDs, domes and the FPC or circuit below share the same space under the keys.
How keypad backlighting reaches the finger
Silicone rubber is naturally opaque, so light does not pass through a standard dark key by itself. A backlit keypad opens a path for the LED light: a clear or tinted section in the key, a molded light guide that carries light from the LED to the face, or a translucent elastomer compound that diffuses the glow. The method decides how evenly the light spreads, how bright the legend reads in a dark room, how the panel seals around the light path, and how many LEDs and parts the assembly needs.
Uniformity is the usual failure point. A single LED under an opaque key makes a bright spot; without diffusion or a guide, the face is uneven. The silicone color and translucency, the LED position and count, and any light guide are tuned together so the lit keys read evenly rather than as individual dots. In a sealed panel, the light path also has to keep water and dust out, which constrains how a window or guide can be built into the keypad.

A backlit keypad spreads LED light across the key face: the diffusion method decides whether the legends read evenly or show individual bright spots.
Comparison: LED window vs light guide vs tinted elastomer
| Parameter | LED window | Light guide | Tinted / translucent elastomer |
|---|---|---|---|
| Light spread | Local to the lit window | Distributed across keys or panel | Diffused through the silicone |
| Uniformity | Even within the window; spots if LED close | Most even across multiple keys | Even, depends on tint and thickness |
| LED count | One or more per lit window | Fewer LEDs, guide distributes light | LEDs behind translucent keys |
| Sealing | Window molded into the key; sealed build possible | Guide adds a layer; seal around edges | Elastomer itself keeps the seal |
| Legend visibility | Legend printed or etched in the window | Light behind legends on the face | Glow through tinted key, legends contrast |
| Relative cost | Moderate, simple per-key build | Highest, guide design and tooling | Moderate, compound and molding change |
| Best fit | Single key indicators, status keys | Multi-key panels, even panel glow | Soft diffused look, low-light keypads |

Under the keys, the backlight shares space with domes or pills; LED placement and contact layout are worked out on the same circuit.
How each backlight method behaves
LED window builds a clear or translucent window into the key or legend area, with an LED placed behind it. The light shows through that local window rather than across the whole key. Uniformity holds within the window when the LED is spaced or diffused behind it, but a close LED still makes a bright spot. This method suits status indicators, single lit keys and legends that only need a local glow. It uses one or more LEDs per lit window and keeps the rest of the key opaque.
Light guide uses a molded plastic or silicone guide that carries light from a small number of LEDs to the key faces or across the panel. The guide spreads and distributes the light, which gives the most even multi-key glow and reduces the LED count. Its cost and complexity are higher: the guide needs design, tooling and alignment with the LEDs and keys, and it adds a layer under the keypad. It suits panels where several keys must read evenly and the panel look matters more than the lowest cost.
Tinted or translucent elastomer changes the silicone compound itself to a lighter, translucent or tinted grade that diffuses the LED glow through the key. The backlight reads as a soft even glow through the rubber, without a separate guide, and the elastomer keeps the keypad seal. Uniformity depends on the tint, the silicone thickness and the LED placement; a dark thick tint dims the glow, while a too-light compound lets bright spots show. It suits keypads that want a soft diffused look and a sealed, simple build.
Which method for which application
Automotive and cabin controls. Dashboard and steering-column keypads need even legend visibility at night, often across several keys. A light guide serves a multi-key panel that must glow uniformly; tinted elastomer works for a soft glow on fewer keys. LED windows suit individual indicator and function keys. Vibration and the dark cockpit reading condition are reviewed with the LED brightness and diffusion.
Medical devices. Handheld instruments, bed-side controls and dark-room equipment often need low-light visibility with a sealed, washable keypad. Tinted elastomer keeps the seal and gives a soft diffused look; a light guide handles multi-key panels in larger fixed devices. Brightness must be readable at night without glaring in a dark room, and the compound must hold up to disinfectants.
Industrial panels. Machine controls, remote pendants and plant keypads may sit in low-light or shift-work conditions. LED windows mark status and critical keys; a light guide or tinted elastomer backlights the full keypad where operators read legends in dim conditions. Sealing against dust, oil and washdown is kept together with the light path.
Consumer electronics. Remotes, handheld gadgets and small keypads balance cost against the backlight look. Tinted elastomer or a simple LED window suits low-cost, few-key devices; a light guide is reserved for premium panels where even multi-key lighting justifies the tooling.
LED placement, count and diffusion
The method and the LED layout are one decision. A window or tinted key needs its LED positioned so the light reaches the window without a hard spot; a light guide collects the LED light and redistributes it, so fewer LEDs are placed along the guide edge. LED brightness, color and spacing are chosen against the silicone tint and thickness: a dark thick elastomer needs a brighter LED to read through it, while a light compound shows spots easily. The keypad sample is lit and checked in a dark room before production, because uniformity cannot be judged on a lit bench.
Selection checklist
1. How many keys must light. One or two status keys fit an LED window. A panel where several keys read evenly favors a light guide or tinted elastomer across the group.
2. Uniformity expected. Even glow across the face demands diffusion through a guide or translucent compound. Local indicator light can sit in a window without full-panel spreading.
3. Sealing requirement. A washable or sealed panel favors the elastomer that keeps the seal; any window or guide joint must be sealed against the same IP rating.
4. LED count and cost target. A guide cuts LED count but adds tooling; windows and tinted keys use LEDs per lit position. Match the part count and tooling to the volume and budget.
5. Silicone color and thickness. Dark, thick keys dim the backlight; light, thin compounds glow easier but show spots. The tint and thickness are chosen with the LED brightness.
6. Dark-room reading and glare. The panel must read in low light without glaring in a dark room. LED brightness and diffusion are checked at night-use levels, not daytime brightness.
Common selection mistakes
The first mistake is placing LEDs under an opaque keypad without a diffusion path. The dark-room panel failed this way: bright spots next to dim keys because nothing spread the light across the face.
The second mistake is choosing a light guide for a single indicator key. The guide tooling and alignment add cost and parts that a simple window or tinted key does not need.
The third mistake is ignoring silicone tint and thickness. A dark compound bought for appearance dims the backlight until the legends barely read, while an over-light compound shows individual LED dots.
The fourth mistake is treating the backlight as separate from the seal. A window or guide that opens the keypad edge can admit moisture unless the light path is built into the sealed molding.
The fifth mistake is judging uniformity in a lit room. Bright spots and uneven tint only show clearly in a dark room. A lit sample in low light confirms the look before production.
What Shanyo supplies and tests
At Shanyo we build backlit silicone keypads with LED windows, light guides or tinted translucent elastomer, matched to the panel's uniformity, sealing and cost target. The keypad integrates membrane switch contacts, domes or pills, with LED placement and the circuit below worked out together. We check the lit uniformity in a dark room on the prototype, and sample keypads ship within 48 hours of the drawing freeze.
Shanyo manufactures OEM and wholesale silicone buttons, dome arrays, membrane switches and FPC assemblies from our Qingdao factory. Send us the number of lit keys, the uniformity and seal requirement, the silicone color, the dark-room brightness target and the contact type, and our engineering team will recommend the backlight method and quote factory pricing. Contact Shanyo for a backlit keypad sample.
Silicone compound, tint and legend methods
The elastomer compound decides how light passes through the key. A standard opaque grade blocks the LED; a translucent or tinted grade lets a controlled amount through. The tint depth sets the balance between a soft glow and a dark key face: lighter compounds transmit more light but reveal the LED position, darker compounds hide the dots but dim the legend. Thickness matters the same way: a thick key body absorbs more light than a thin one, so the LED brightness and the compound are matched to the actual molded key geometry.
Legends on a backlit keypad read through contrast or through the light itself. A legend can be printed on the lit face, etched through a dark top layer to the lighter silicone below, or formed as a dual-shot key where the legend color glows differently from the body. For a window, the legend sits in the clear area; for a tinted elastomer, the legend contrast is set against the glow. The legend method and the backlight method are chosen together, because a printed mark on a translucent key can wash out when lit.
Light guide design and assembly
A light guide collects LED light at its edge or entry and carries it through a molded shape to the key faces, using geometry and sometimes reflective or diffusing features to spread the beam. It reduces the number of LEDs needed for an even panel glow, but it adds a molded part that must align with the LEDs and sit level under the keys. The guide can be a separate plastic piece or a silicone feature molded into the keypad stack. Assembly alignment matters: a guide shifted from the LED entry loses light at the edge and shows uneven brightness on one side of the panel.
Where the guide meets the keypad and the circuit, the stack-up leaves room for the LEDs, the guide, the contacts and any dome or pill below. In a sealed panel, the guide and window edges are built so the keypad still seals to the required IP rating rather than leaving an open light path around the molding.
Colors, brightness and night use
Backlight color follows the panel's language: green or amber for status, white for general legend reading, red for warning or stop functions. LED color and the silicone tint interact, so a tint that looks neutral in daylight can shift the lit color at night. Brightness is set for the darkest expected use: too bright in a dark room causes glare and pupil adaptation, too dim leaves the legends unreadable. Dimming control on a multi-level panel lets the same keypad suit both lit and dark conditions.
Checking the backlight before production
Before a keypad goes to production, we mold a sample in the chosen compound and tint, place the LEDs to the selected layout, and check the lit panel in a dark room for uniformity, bright spots, legend contrast and color. We confirm the seal around any window or guide, and verify the contact feedback under the lit keys. The compound tint, LED count and position, legend method and seal rating are recorded on the drawing so a later reorder keeps the same backlit keypad.
- John Smith, Senior Application Engineer, Shanyo Precision Electronics, Qingdao